🩺 Station 1 — Detection of Glucose in Urine
AIM OSPE/OSCE Lab — Practical Station | KMU Style | MBBS Practical + Viva
📋 Complete OSPE Station Content
OSPE Station Name
Station 1 — Detection of Glucose in Urine
Module: Neuroscience
Year: 2nd Year MBBS
Subject / Integration: Biochemistry / Physiology / Clinical Integrated
Learning Target
By the end of this station, the student should be able to:
- Correctly handle a urine sample and perform a simple test for detection of glucose in urine.
- Interpret positive and negative urine glucose results and relate them to clinical significance.
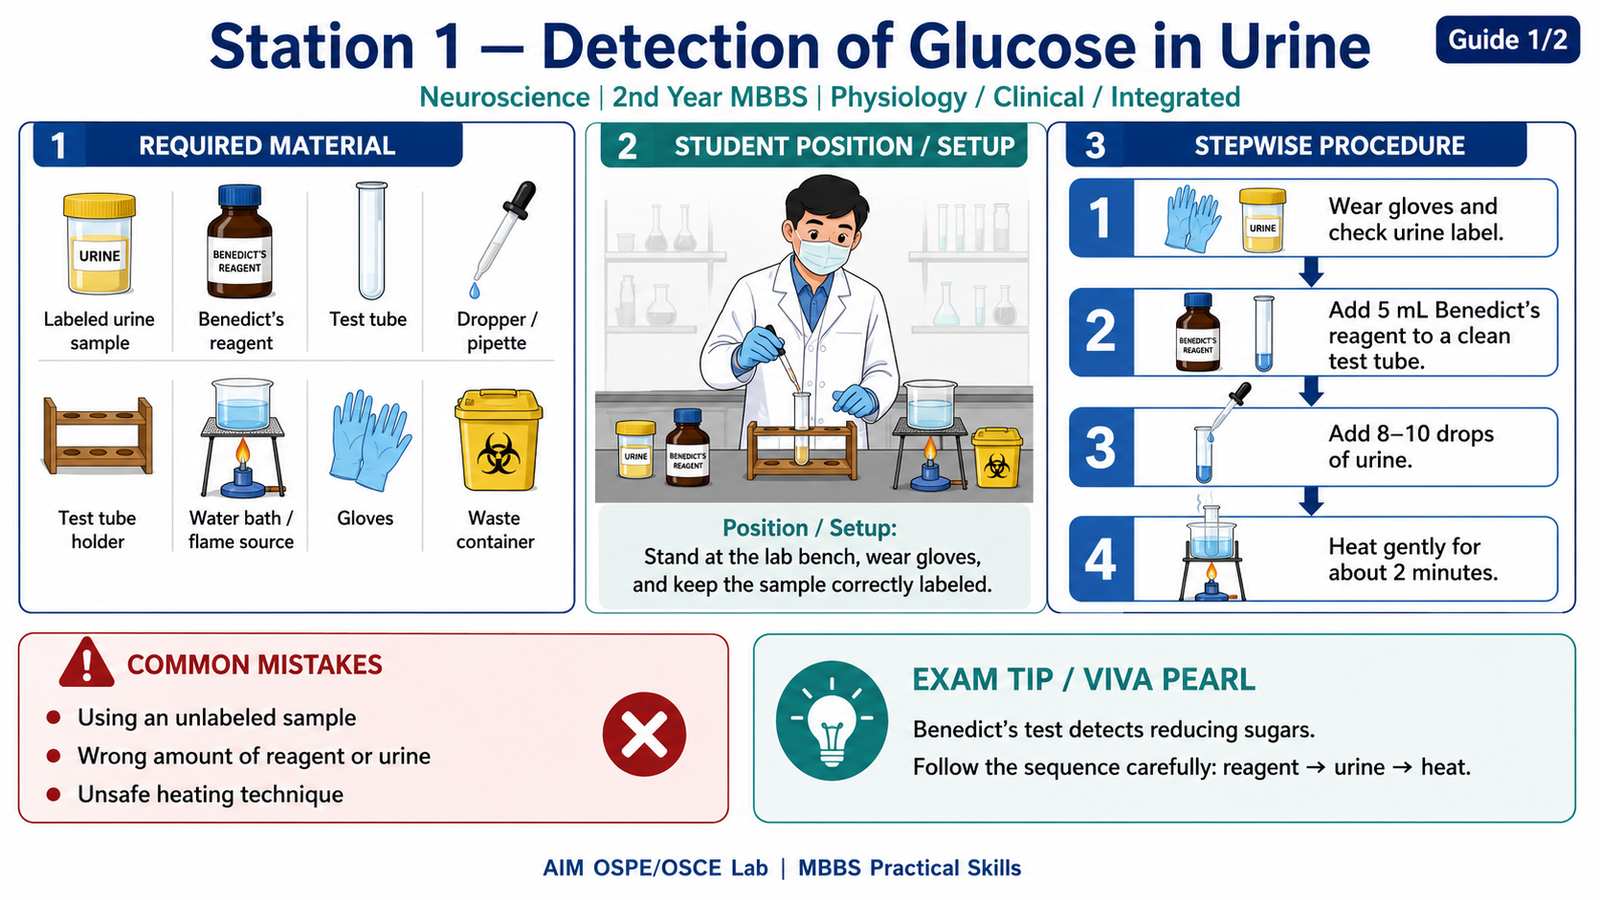
Required Material
- Fresh urine sample in a clean, labeled container
- Benedict’s reagent
- Test tube
- Test tube holder
- Dropper / pipette
- Water bath or spirit lamp / Bunsen burner
- Measuring cylinder or marked test tube
- Gloves
- Waste discard container
- Tissue / cleaning material
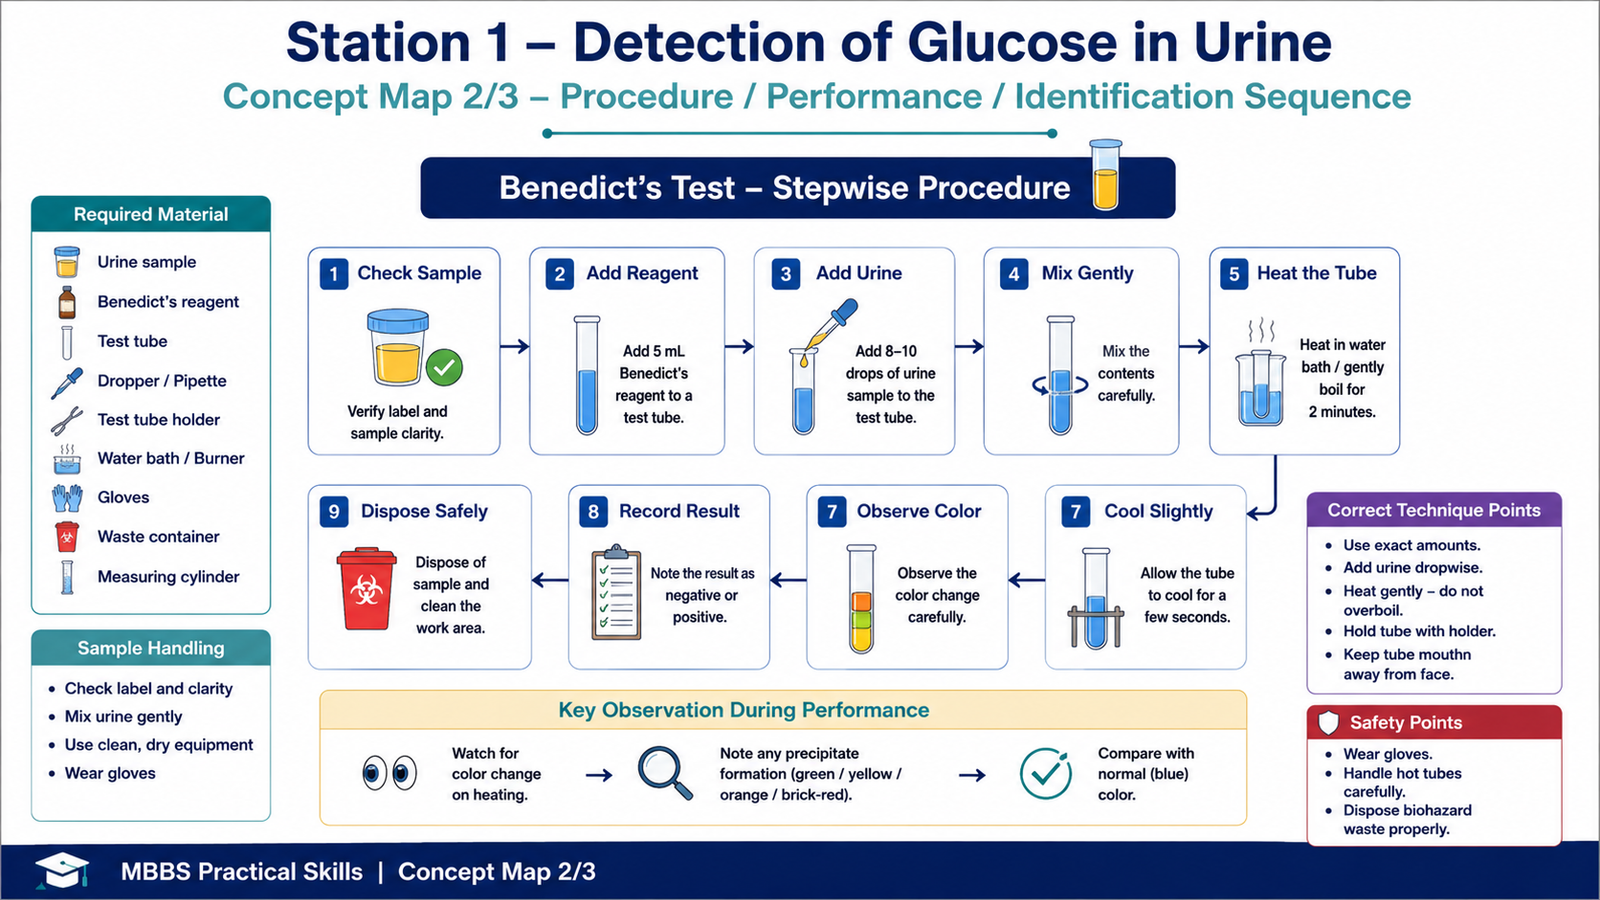
Student Task / Procedure
- Wear gloves and check that the urine sample is properly labeled.
- Mix the urine sample gently.
- Take 5 mL Benedict’s reagent in a clean test tube.
- Add 8–10 drops of urine into the test tube.
- Hold the test tube safely using a test tube holder.
- Heat the test tube in a water bath or gently boil for about 2 minutes.
- Allow the tube to cool slightly.
- Observe the color change.
- Report whether glucose is absent or present.
- Dispose of the sample safely and clean the working area.
Observation / Identification Points
The student should observe:
- Proper urine sample handling and labeling
- Use of gloves and clean apparatus
- Correct amount of Benedict’s reagent
- Correct addition of urine sample
- Safe heating technique
- Final color of the solution after heating
- Correct interpretation of color change
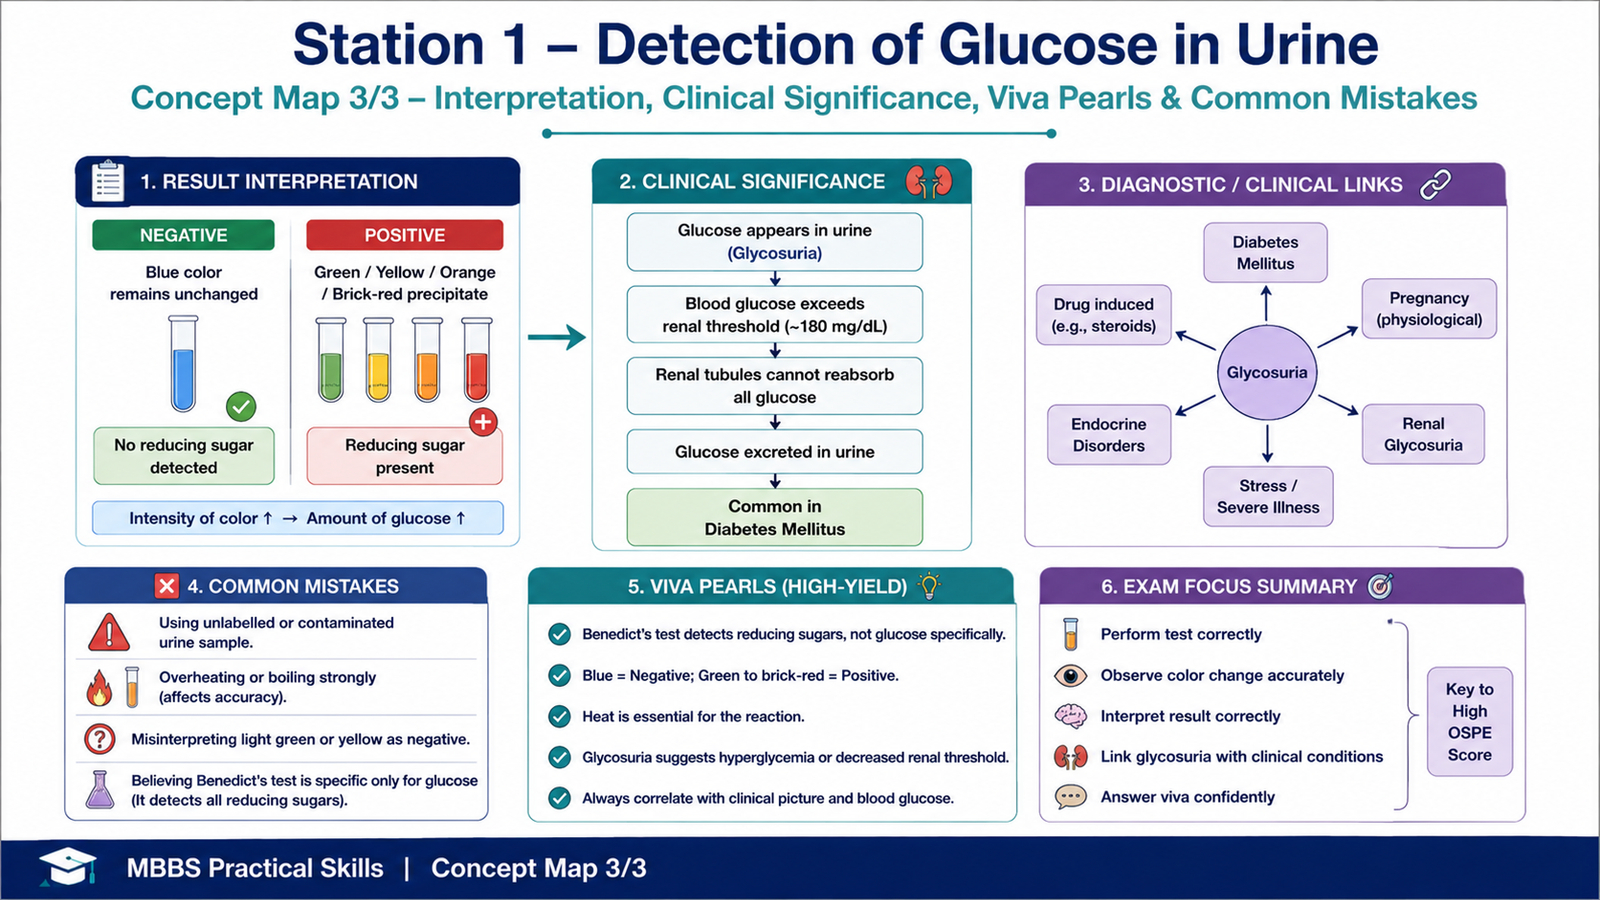
Result / Interpretation
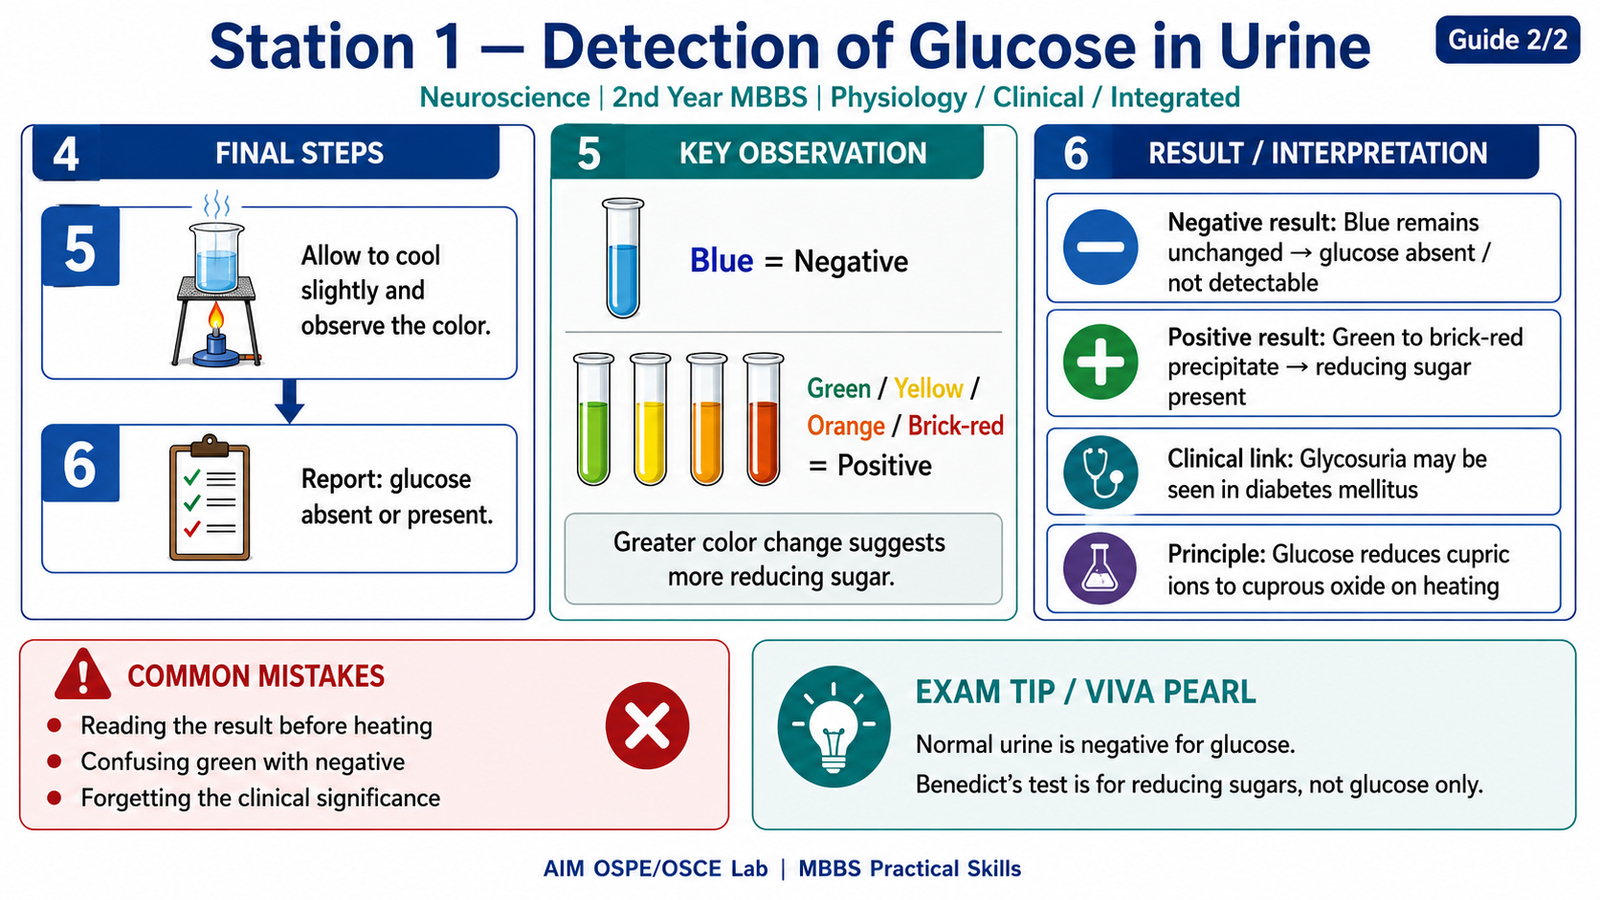
Negative Result
Color: Blue remains unchanged
Interpretation: Glucose is absent or not detectable in urine.
Positive Result
Color change: Green, yellow, orange, or brick-red precipitate
Interpretation: Reducing sugar is present in urine.
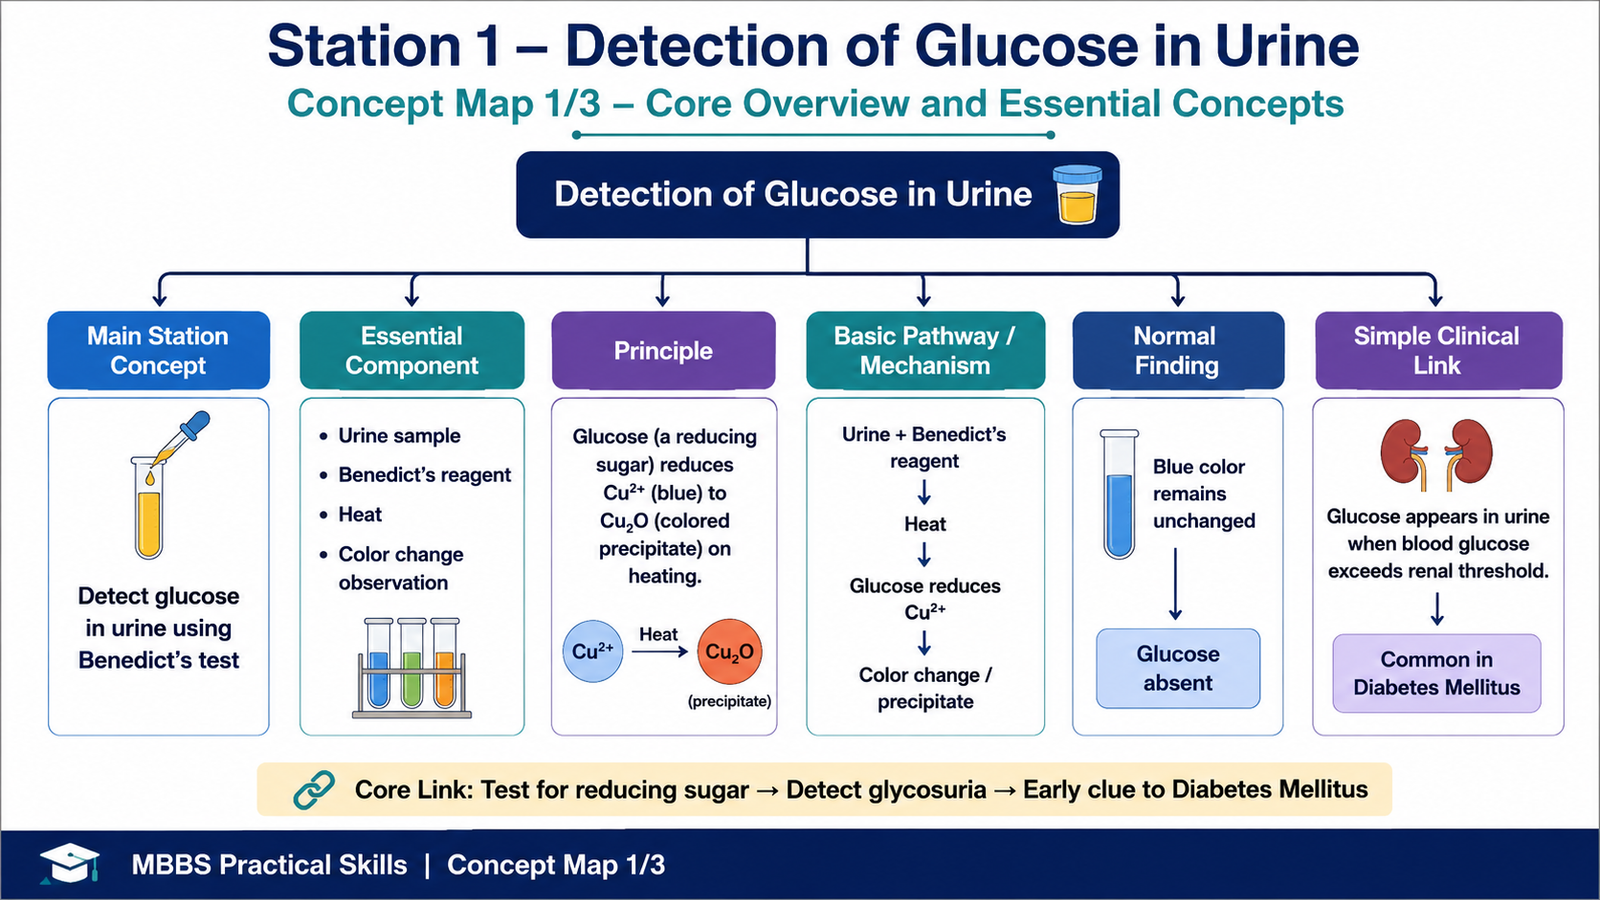
Principle
Benedict’s test detects reducing sugars. On heating, glucose reduces cupric ions to cuprous oxide, producing a colored precipitate.
Clinical Significance
Glucose in urine is called glycosuria. It may occur when blood glucose exceeds the renal threshold, commonly in diabetes mellitus. It may also be seen in renal glycosuria or pregnancy.
Viva Questions
1. What is the normal result for glucose in urine?
Ideal Answer: Normally, glucose is absent in urine.
2. What color indicates a negative Benedict’s test?
Ideal Answer: Blue color indicates a negative result.
3. What does a brick-red precipitate indicate?
Ideal Answer: It indicates a strongly positive result for reducing sugar.
4. What is glycosuria?
Ideal Answer: Glycosuria means the presence of glucose in urine.
5. Why can glucose appear in urine in diabetes mellitus?
Ideal Answer: Because blood glucose rises above the renal threshold, so glucose is excreted in urine.
Common Student Mistakes
- Using an unlabeled or contaminated urine sample
- Overheating the test tube or heating it unsafely
- Reporting any color change without linking it to positive or negative interpretation
- Forgetting that Benedict’s test detects reducing sugars, not only glucose specifically
AIM Feedback
You performed this station well if you handled the urine sample safely, followed the Benedict’s test steps correctly, and interpreted the final color accurately. Remember that the main exam focus is not lengthy theory, but safe handling, correct testing, color recognition, and clinical interpretation. A blue result means negative, while green to brick-red indicates a positive reducing sugar result. Always connect glycosuria clinically with diabetes mellitus and renal threshold.
🖼️ Visual / Image Support
🧩 Concept Map / Interpretation Support