🩺 Station 2 — Detection of Glucose in Blood
AIM OSPE/OSCE Lab — Practical Station | KMU Style | MBBS Practical + Viva
📋 Complete OSPE Station Content
OSPE Station Name
Station 2 — Detection of Glucose in Blood
Module: Neuroscience
Year: 2nd Year MBBS
Subject / Integration: Physiology / Biochemistry / Clinical Integrated
Learning Target
By the end of this station, the student should be able to:
- Correctly handle a blood sample and measure blood glucose using a glucometer.
- Interpret blood glucose result as normal, high, or low and relate it to clinical significance.
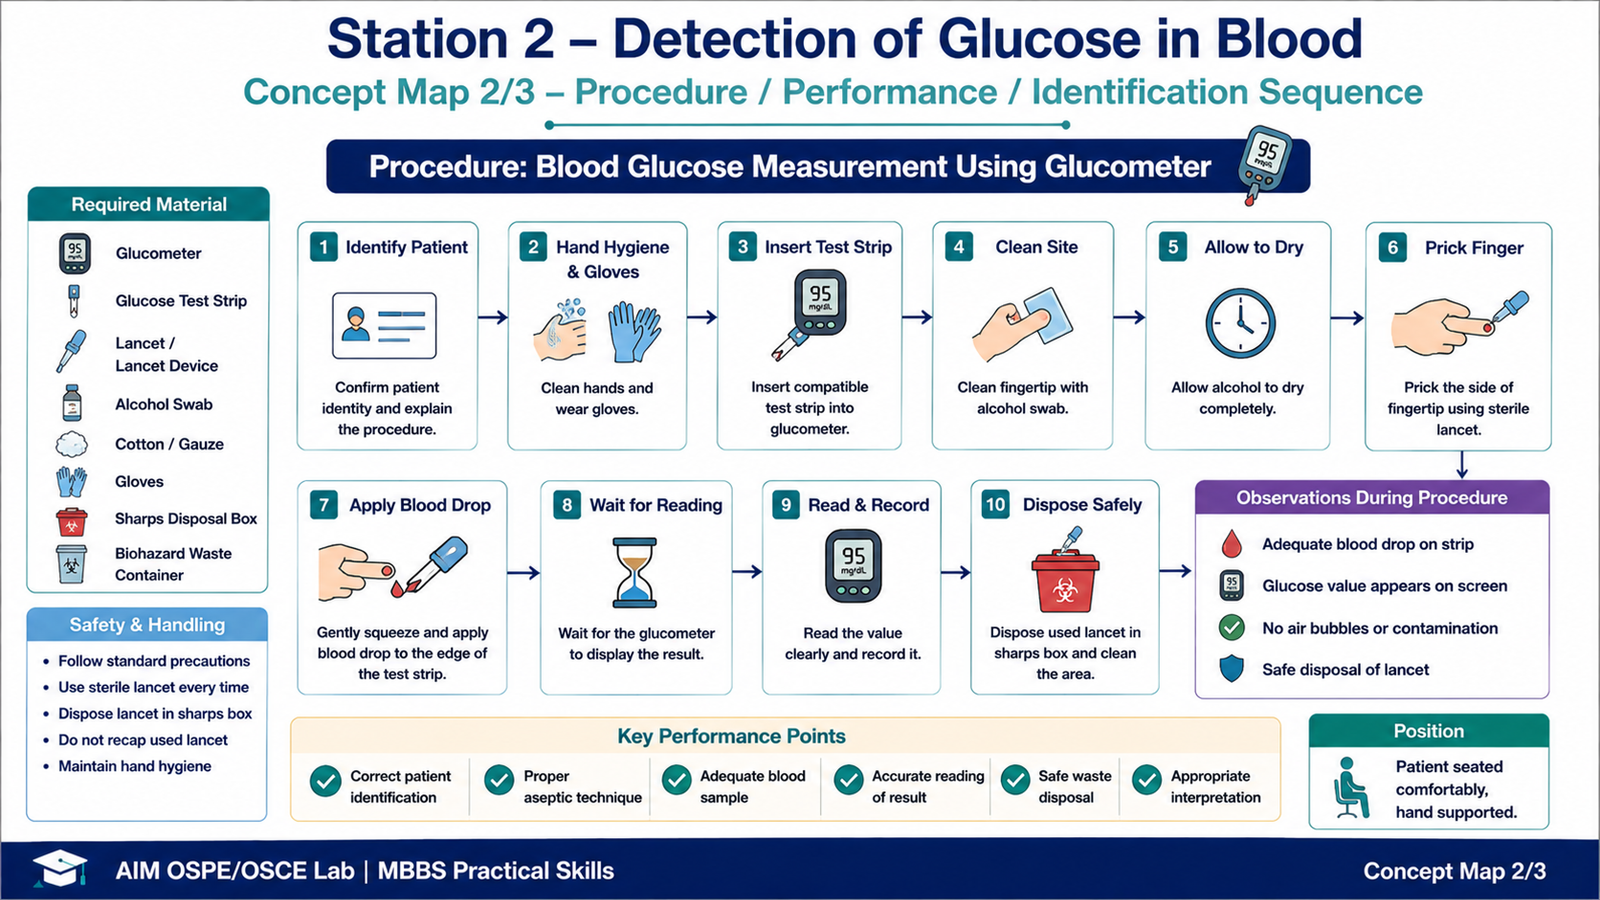
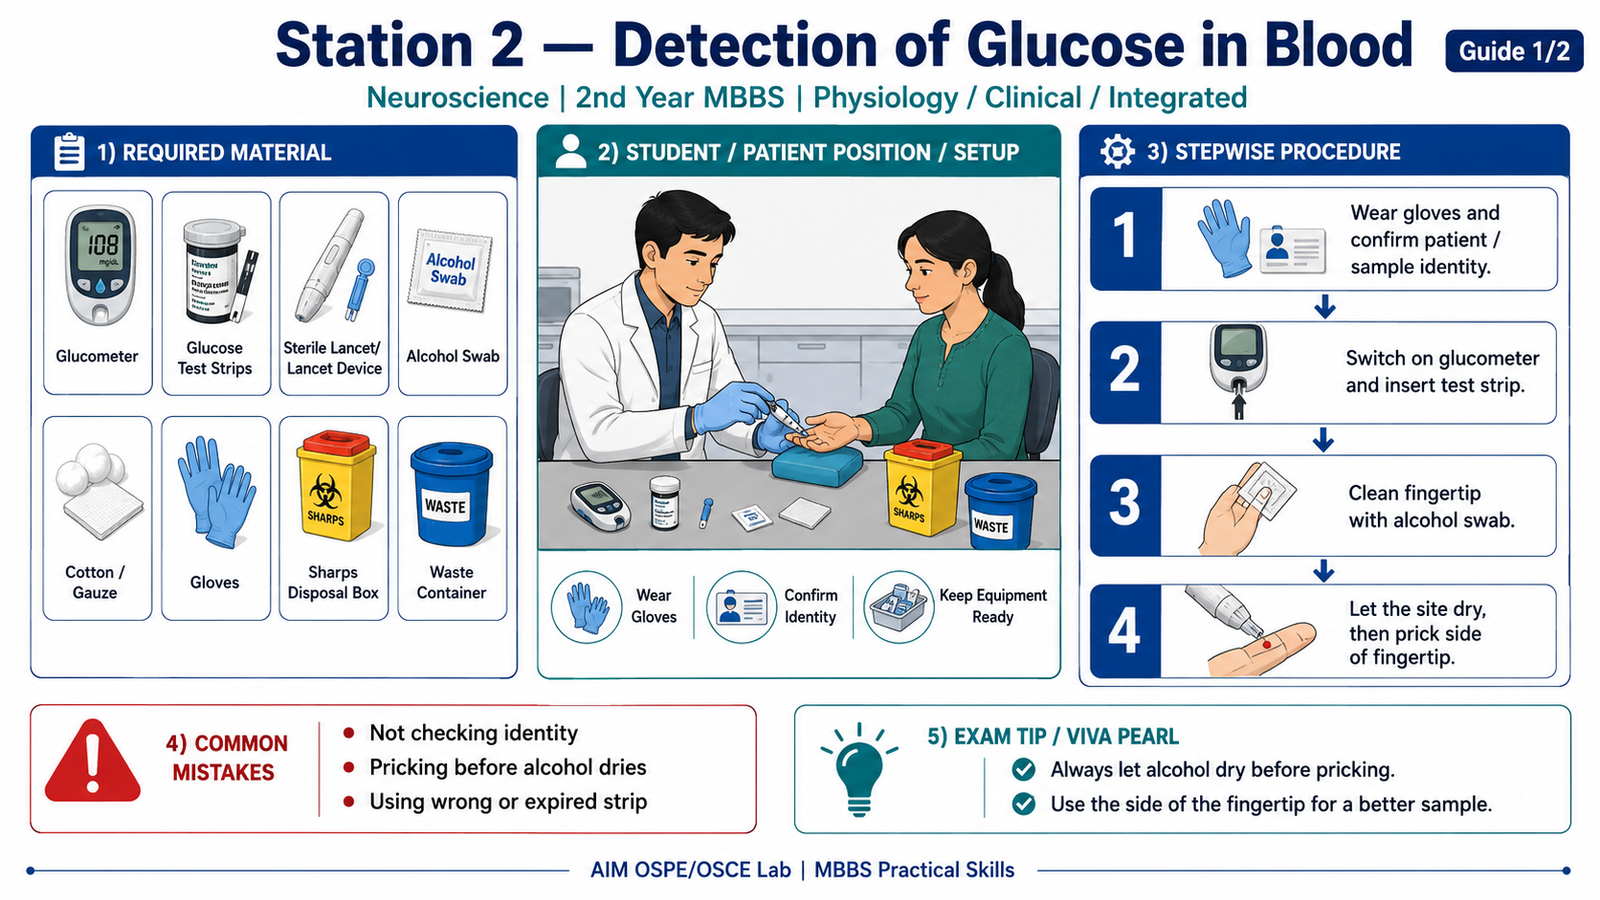
Required Material
- Glucometer
- Compatible glucose test strips
- Sterile lancet / lancet device
- Alcohol swab
- Cotton ball / gauze
- Gloves
- Sharps disposal box
- Biohazard waste container
- Patient/sample record sheet
Student Task / Procedure
- Wear gloves and check the patient/sample identity.
- Switch on the glucometer and insert the test strip.
- Clean the fingertip with an alcohol swab.
- Allow the site to dry.
- Prick the side of the fingertip using a sterile lancet.
- Wipe away the first drop if required by local lab instruction.
- Apply the next drop of blood to the test strip.
- Wait for the glucometer reading.
- Read and report the blood glucose value.
- Interpret the result as low, normal, or high.
- Dispose of lancet in sharps box and clean the area.
Observation / Identification Points
The student should observe, identify, or demonstrate:
- Correct patient/sample identification
- Proper hand hygiene and use of gloves
- Correct insertion of test strip
- Safe finger-prick technique
- Adequate blood drop application
- Correct reading of glucometer value
- Proper interpretation of result
- Safe disposal of lancet and contaminated material
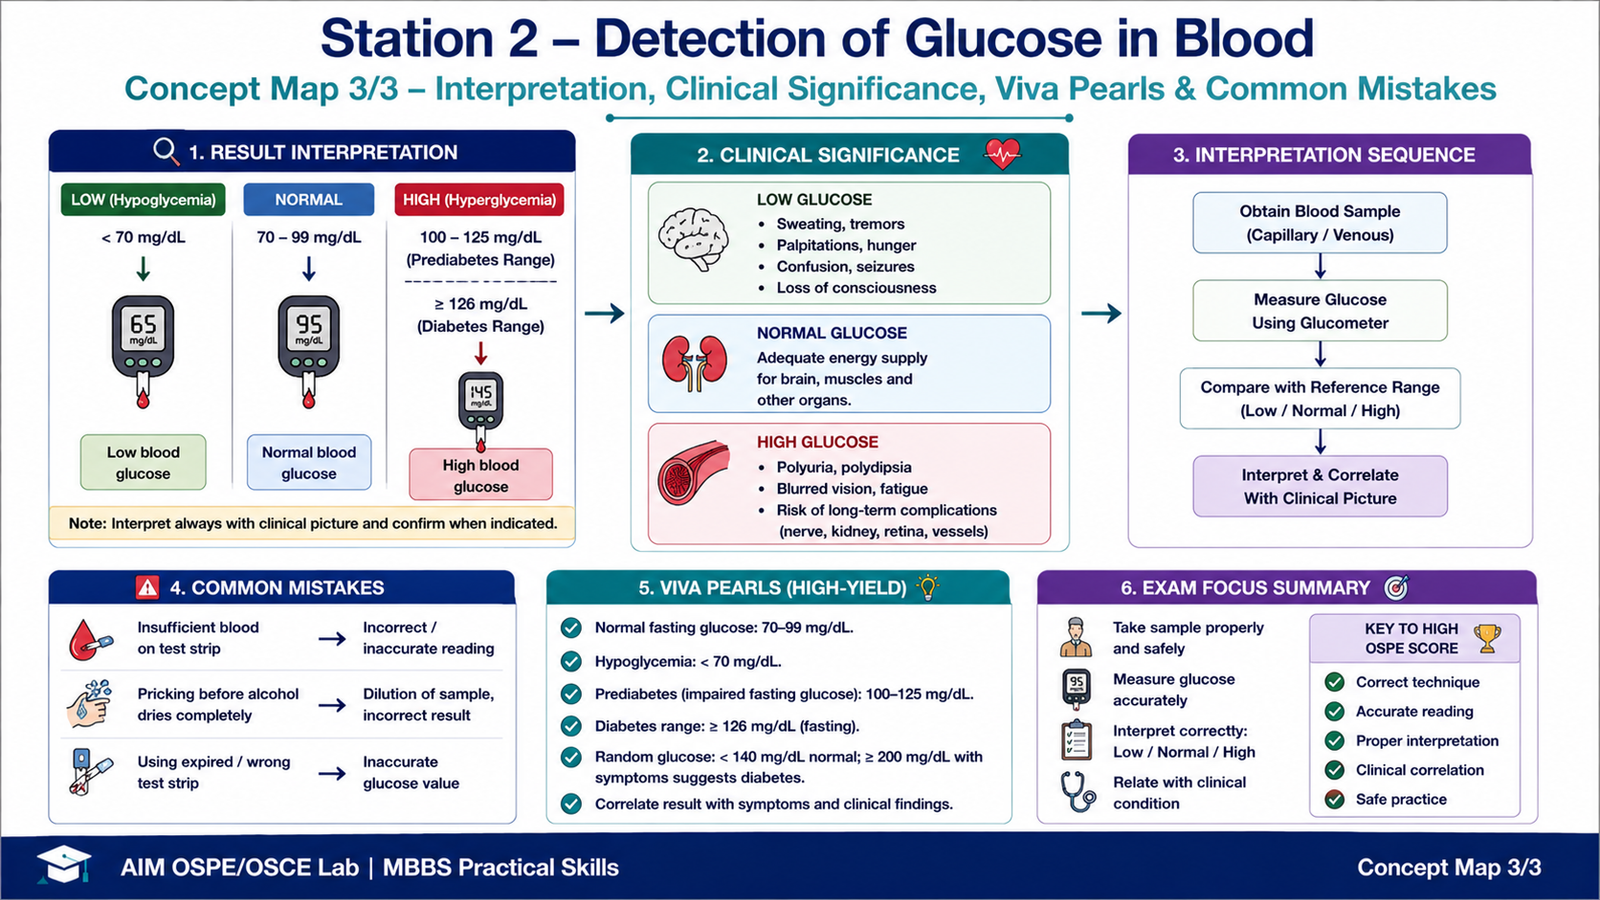
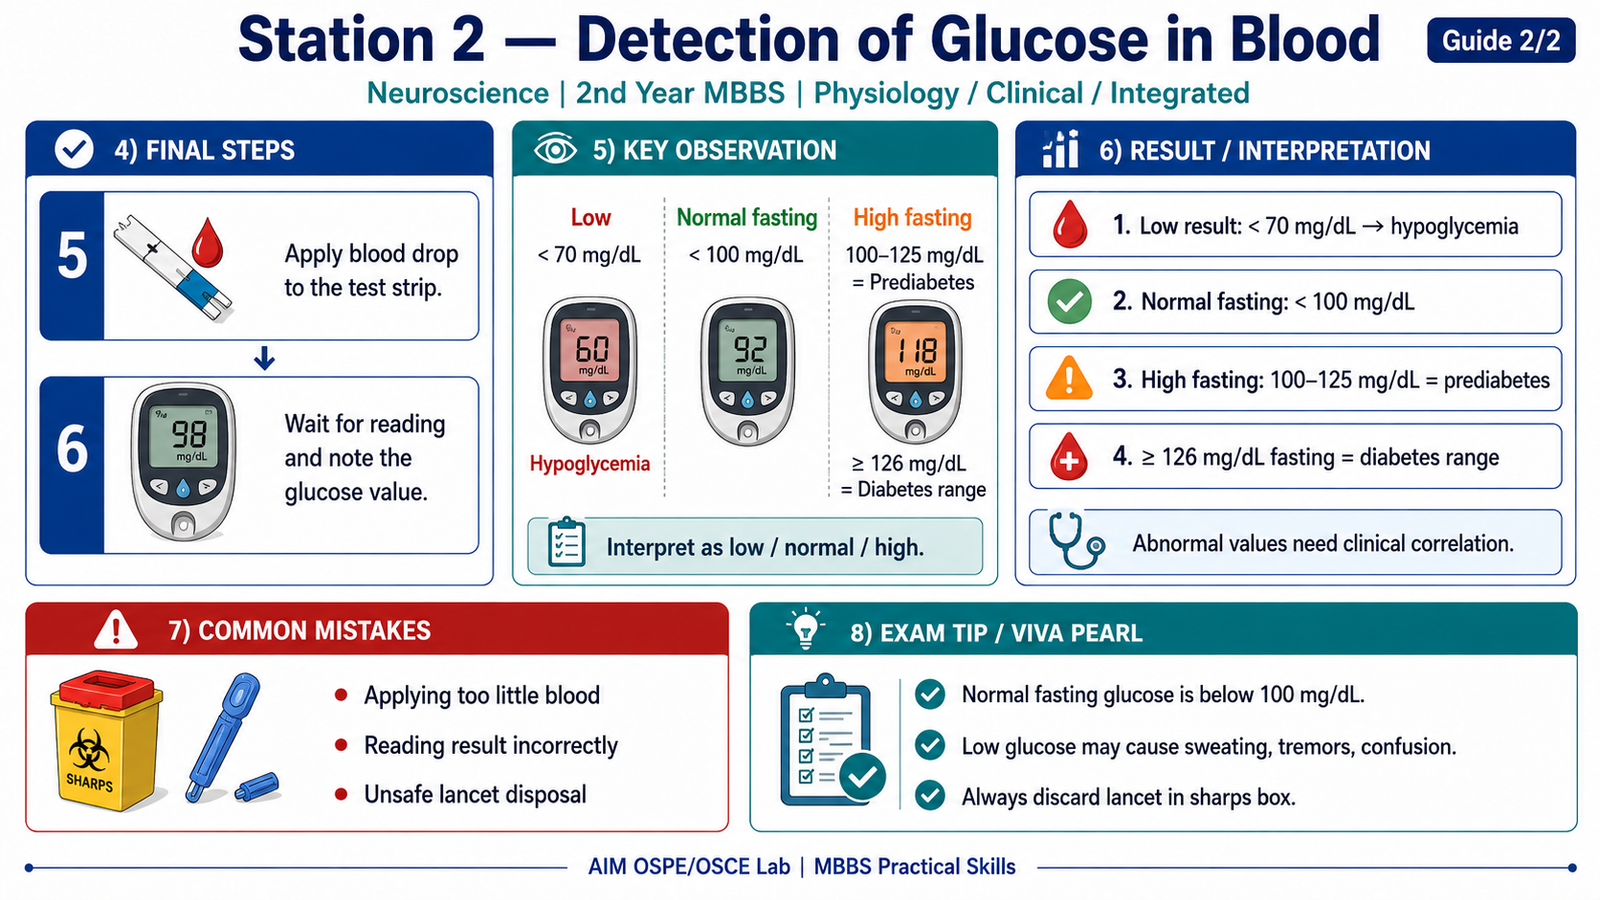
Result / Interpretation
Low Blood Glucose
Result: Less than 70 mg/dL
Interpretation: Hypoglycemia.
Clinical significance: May cause sweating, tremors, palpitations, confusion, seizures, or loss of consciousness if severe. Hypoglycemia is commonly defined as blood glucose below 70 mg/dL.
Normal Blood Glucose
Fasting result: Less than 100 mg/dL
Interpretation: Normal fasting blood glucose.
High Blood Glucose
Fasting result:
- 100–125 mg/dL: Prediabetes range
- ≥126 mg/dL: Diabetes range, needs confirmation
Random result:
- ≥200 mg/dL with classic symptoms suggests diabetes and requires clinical/laboratory confirmation.
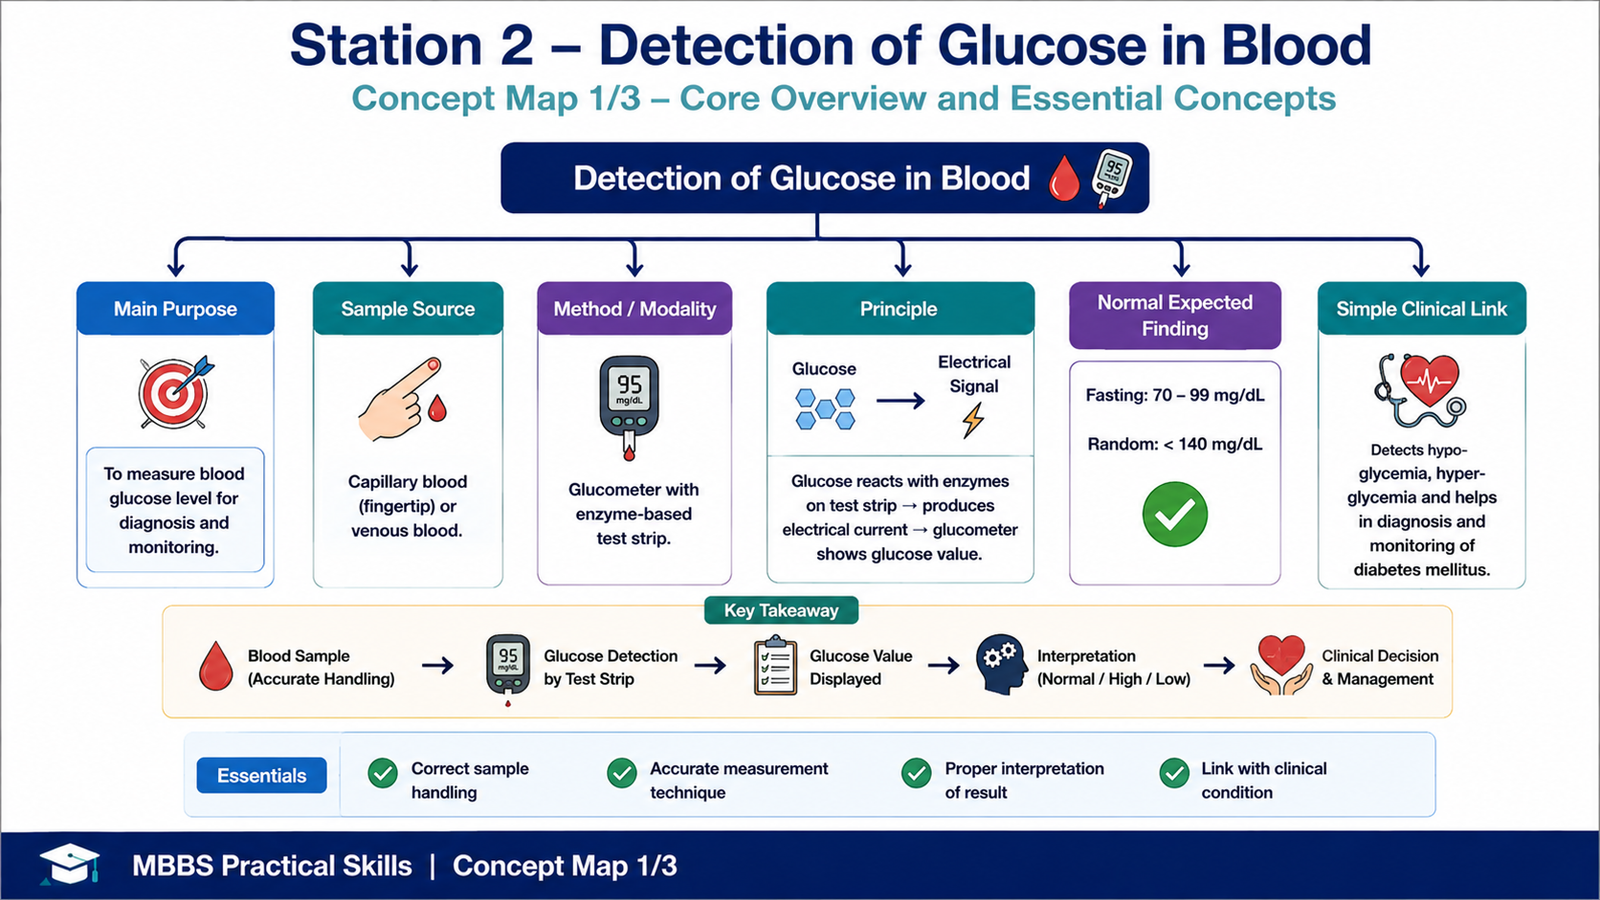
Principle
A glucometer estimates blood glucose using an enzyme-based strip reaction. The glucose in blood reacts on the test strip and produces an electrical signal proportional to glucose concentration.
Clinical Significance
Blood glucose testing is important for detecting hypoglycemia, hyperglycemia, and monitoring patients with diabetes mellitus. In OSPE, the student should focus on safe sample handling, correct technique, accurate reading, and simple clinical interpretation.
Viva Questions
1. What is the normal fasting blood glucose level?
Ideal Answer: Less than 100 mg/dL.
2. What value suggests hypoglycemia?
Ideal Answer: Blood glucose less than 70 mg/dL.
3. What fasting glucose value is in the diabetes range?
Ideal Answer: Fasting blood glucose of 126 mg/dL or higher, confirmed by laboratory testing.
4. Why should alcohol be allowed to dry before pricking the finger?
Ideal Answer: Wet alcohol may dilute the blood drop and affect the reading.
5. Why is the lancet discarded in a sharps box?
Ideal Answer: To prevent needle-stick injury and transmission of infection.
Common Student Mistakes
- Not confirming patient/sample identity before testing
- Pricking before alcohol has dried
- Applying too little blood to the test strip
- Touching the test strip area or contaminating the sample
- Forgetting safe disposal of lancet in the sharps box
AIM Feedback
You performed this station well if you used correct sample handling, performed the finger-prick safely, applied the blood properly to the test strip, and interpreted the glucometer value accurately. In OSPE, do not only read the number—always classify it as low, normal, or high. Remember: low glucose suggests hypoglycemia, high glucose suggests hyperglycemia, and abnormal results should be clinically correlated and confirmed when needed.
🖼️ Visual / Image Support
🧩 Concept Map / Interpretation Support