
Microscope Handling and Slide Focusing
Rapid Revision • Practical Skills • Viva
🎯 Task
You are provided with a compound light microscope and a prepared histology slide. Demonstrate correct handling and focusing of the slide, then briefly describe the tissue-processing sequence and identify the major instruments used during tissue preparation.
🔬 Stepwise Procedure / Approach
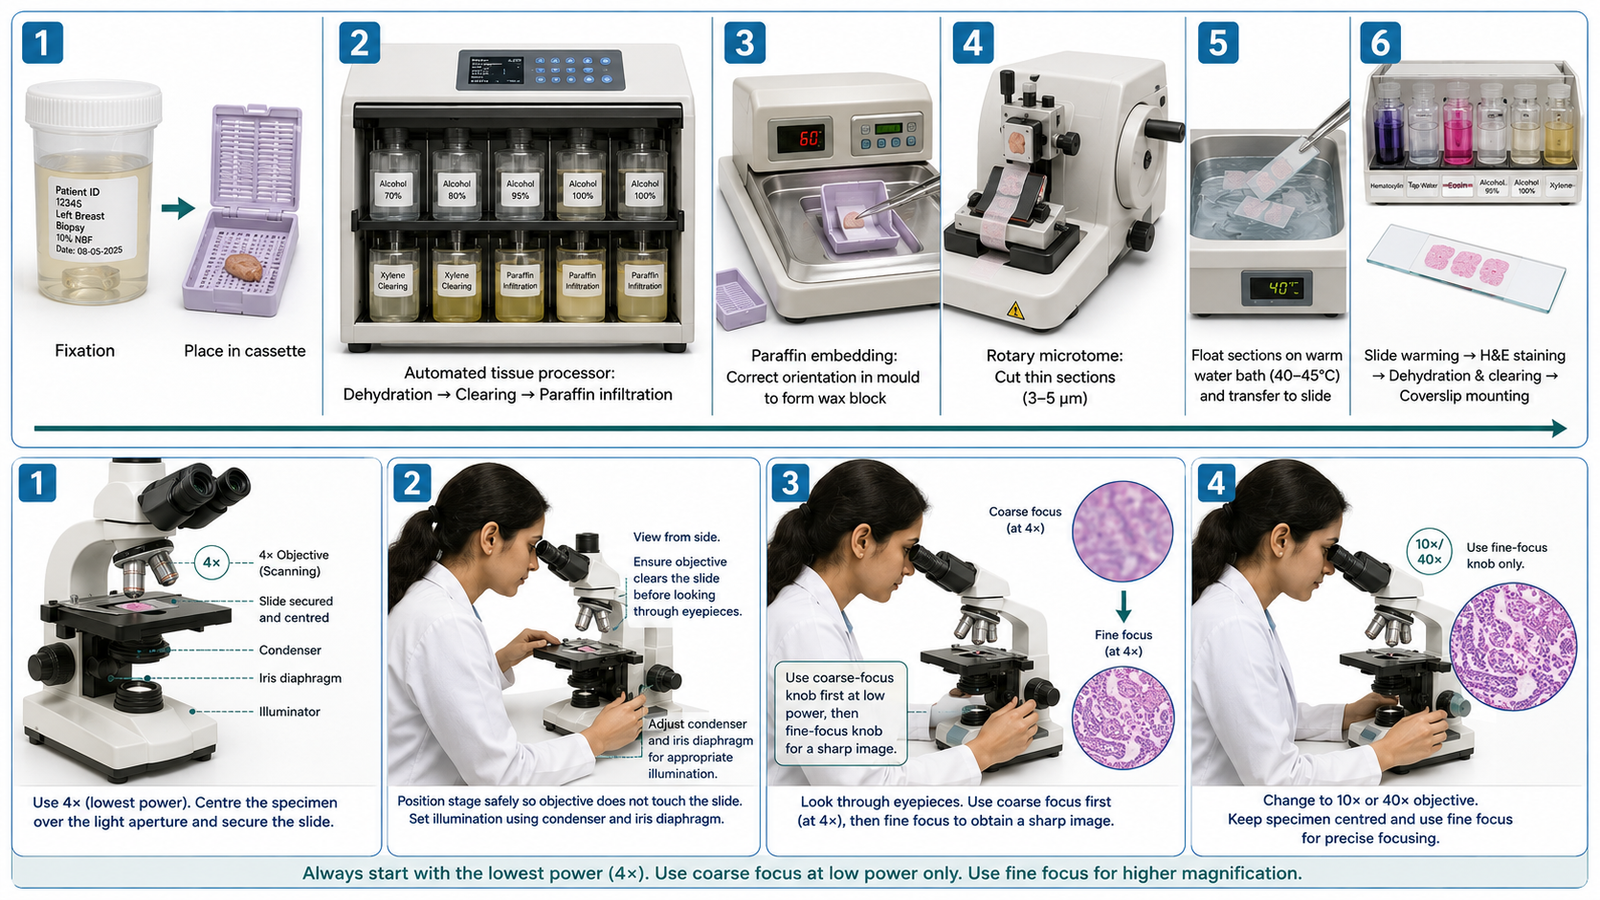
- Prepare the microscope. Place it securely on the bench, check the lenses and illumination, and rotate the lowest-power objective into position.
- Place the prepared slide. Position it on the mechanical stage, secure it with the slide holder, and centre the tissue over the light aperture.
- Adjust illumination. Switch on the light and adjust the condenser, iris diaphragm and light intensity to obtain a clear field.
- Approach the specimen safely. While viewing the objective from the side, bring the low-power objective and slide into an appropriate working position without allowing the lens to strike the slide.
- Focus under low power. Look through the eyepieces and use the coarse adjustment first, followed by the fine adjustment, until the tissue is sharply focused.
- Centre and increase magnification. Move the required area to the centre, rotate to the 10× or 40× objective, readjust illumination if required and use fine focus for precise focusing.
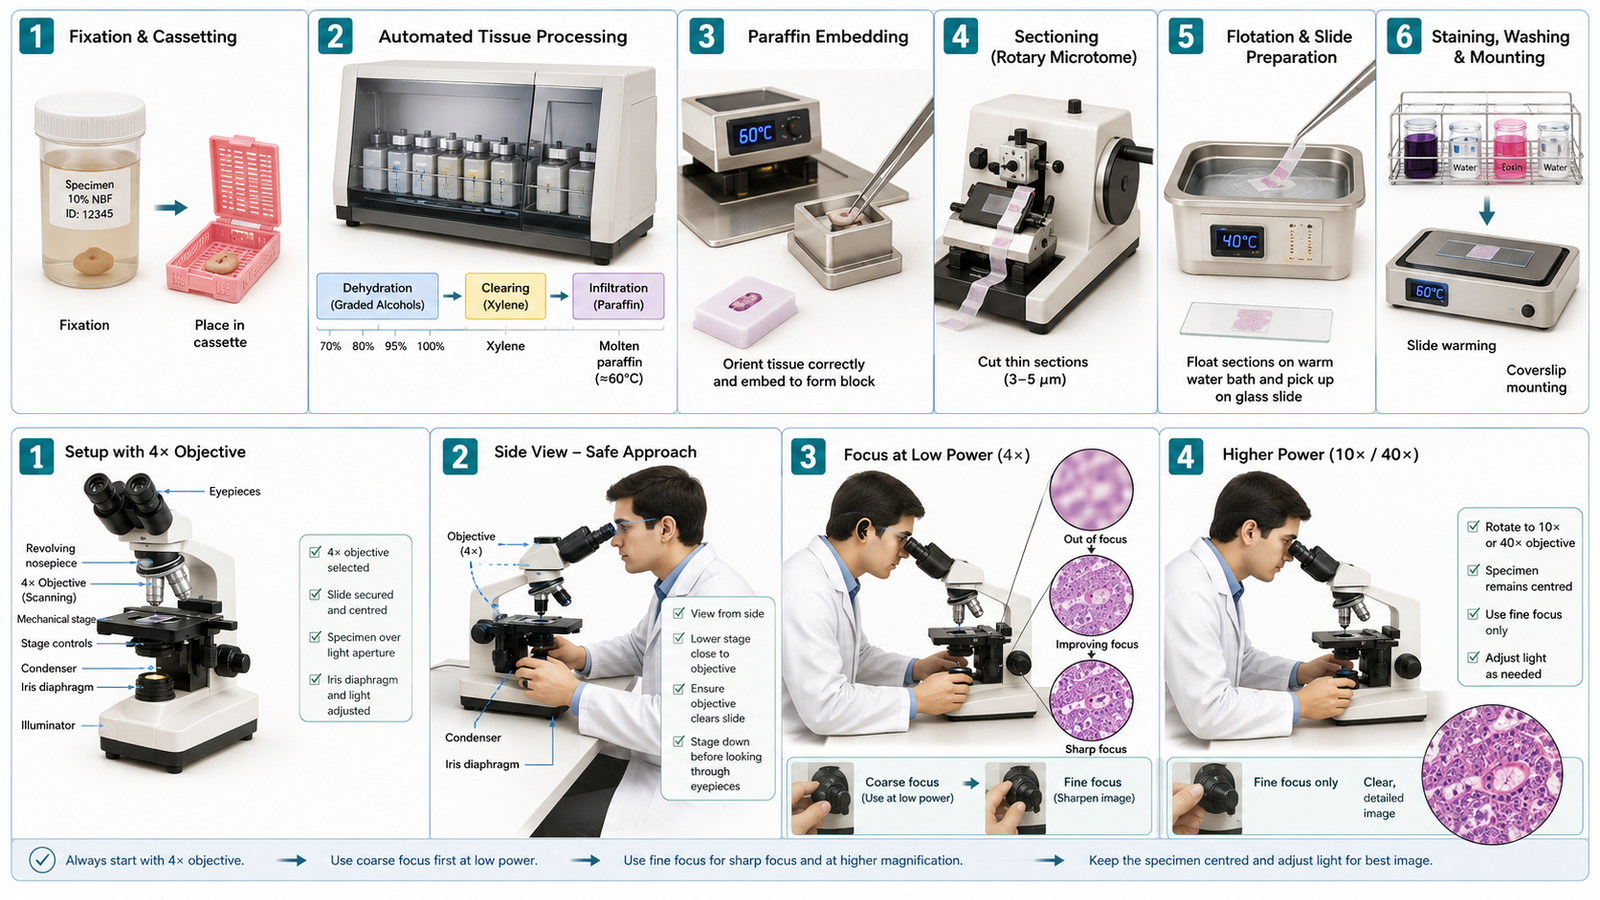
- State the tissue-processing sequence. Describe the routine workflow as fixation → dehydration → clearing → paraffin infiltration → embedding → sectioning → staining → mounting.
- Identify important processing instruments and their uses. Recognize the tissue processor for dehydration, clearing and paraffin infiltration; embedding station for wax embedding and orientation; rotary microtome for cutting thin sections; flotation water bath for flattening sections; slide warmer for drying/adhesion; and staining rack or autostainer for staining.
- Finish safely. Return the microscope to low power, lower the stage, remove the slide, switch off the illumination and clean optical surfaces only with suitable lens paper.
🖼️ Visual Learning
Routine Tissue Processing Sequence and Instruments
Correct Microscope Slide Focusing Technique
🎥 Practical Video
Basic Microscopy – Focusing the Microscope
Source: CDC OneLab REACH :contentReference[oaicite:1]{index=1}
A practical demonstration of correct compound-microscope focusing, including progression through objective magnifications and appropriate use of focusing controls.
📝 Important Viva Questions
Q1. What are the major steps in routine histological tissue preparation?
Fixation, dehydration, clearing, paraffin infiltration, embedding, sectioning, staining and mounting.
Q2. What is the purpose of fixation?
Fixation preserves tissue morphology and prevents autolysis and decomposition. Neutral buffered formalin is commonly used for routine histology.
Q3. What is the purpose of dehydration during tissue processing?
It removes water from the tissue, usually by passing the specimen through increasing concentrations of alcohol.
Q4. What is the purpose of the clearing step?
Clearing replaces alcohol with a medium that is miscible with paraffin wax; xylene is a commonly used clearing agent.
Q5. What is the function of a rotary microtome?
It is used to cut very thin sections from a paraffin-embedded tissue block for microscopic examination.
Q6. Why should focusing begin with the lowest-power objective?
Low power provides a wider field of view and greater working distance, making it easier and safer to locate and centre the specimen.
Q7. When should the coarse-focus knob be used?
It is mainly used for initial focusing under low magnification. Fine adjustment should be used for precise focusing, especially at higher power.
Q8. Why should the specimen be centred before changing to a higher-power objective?
Because the field of view becomes smaller as magnification increases, so an off-centre structure may disappear from view.
Q9. How is the total magnification of a compound microscope calculated?
Total magnification = eyepiece magnification × objective magnification. For example, a 10× eyepiece with a 40× objective gives 400× magnification.