🩺 Station 2 — Renal Angle and Renal Punch
AIM OSPE/OSCE Lab — Practical Station | KMU Style | MBBS Practical + Viva
📋 Complete OSPE Station Content
OSPE Station Name
Station 2 — Renal Angle and Renal Punch
Module: Renal
Year: 2nd Year MBBS
Integration: Anatomy + Clinical Examination + Physiology
Learning Target
By the end of this station, the student should be able to:
- Locate the renal angle correctly using surface anatomical landmarks.
- Perform renal punch gently and safely and state its clinical significance.
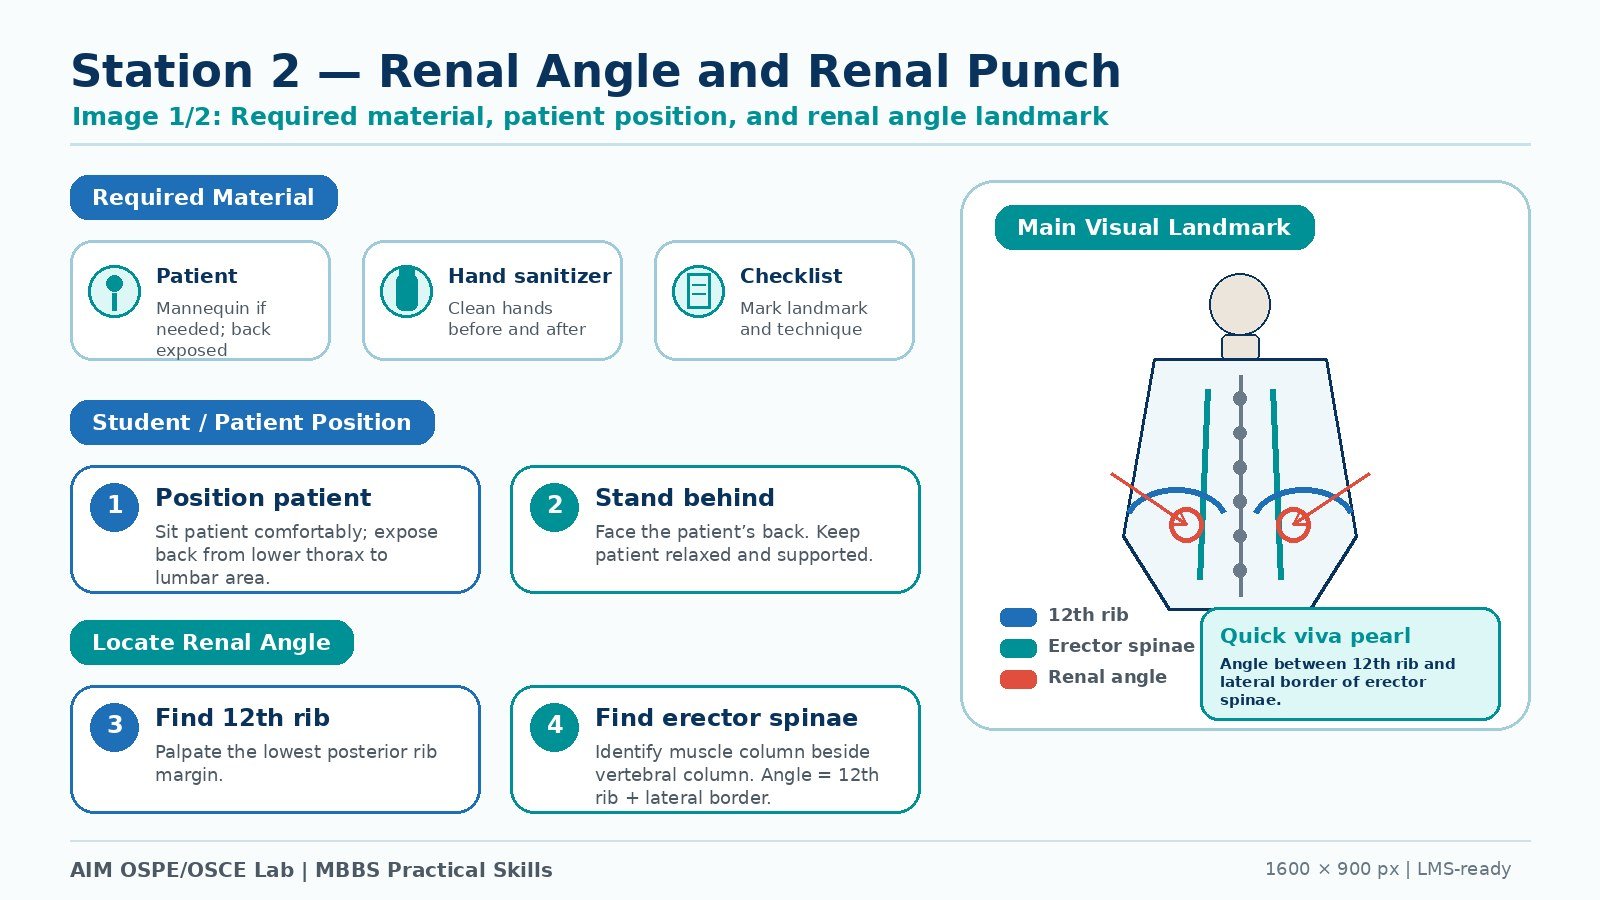
Required Material
- Simulated patient / mannequin
- Examination couch or chair
- Hand sanitizer
- Gloves, if required
- Marking checklist
- Privacy screen / drape
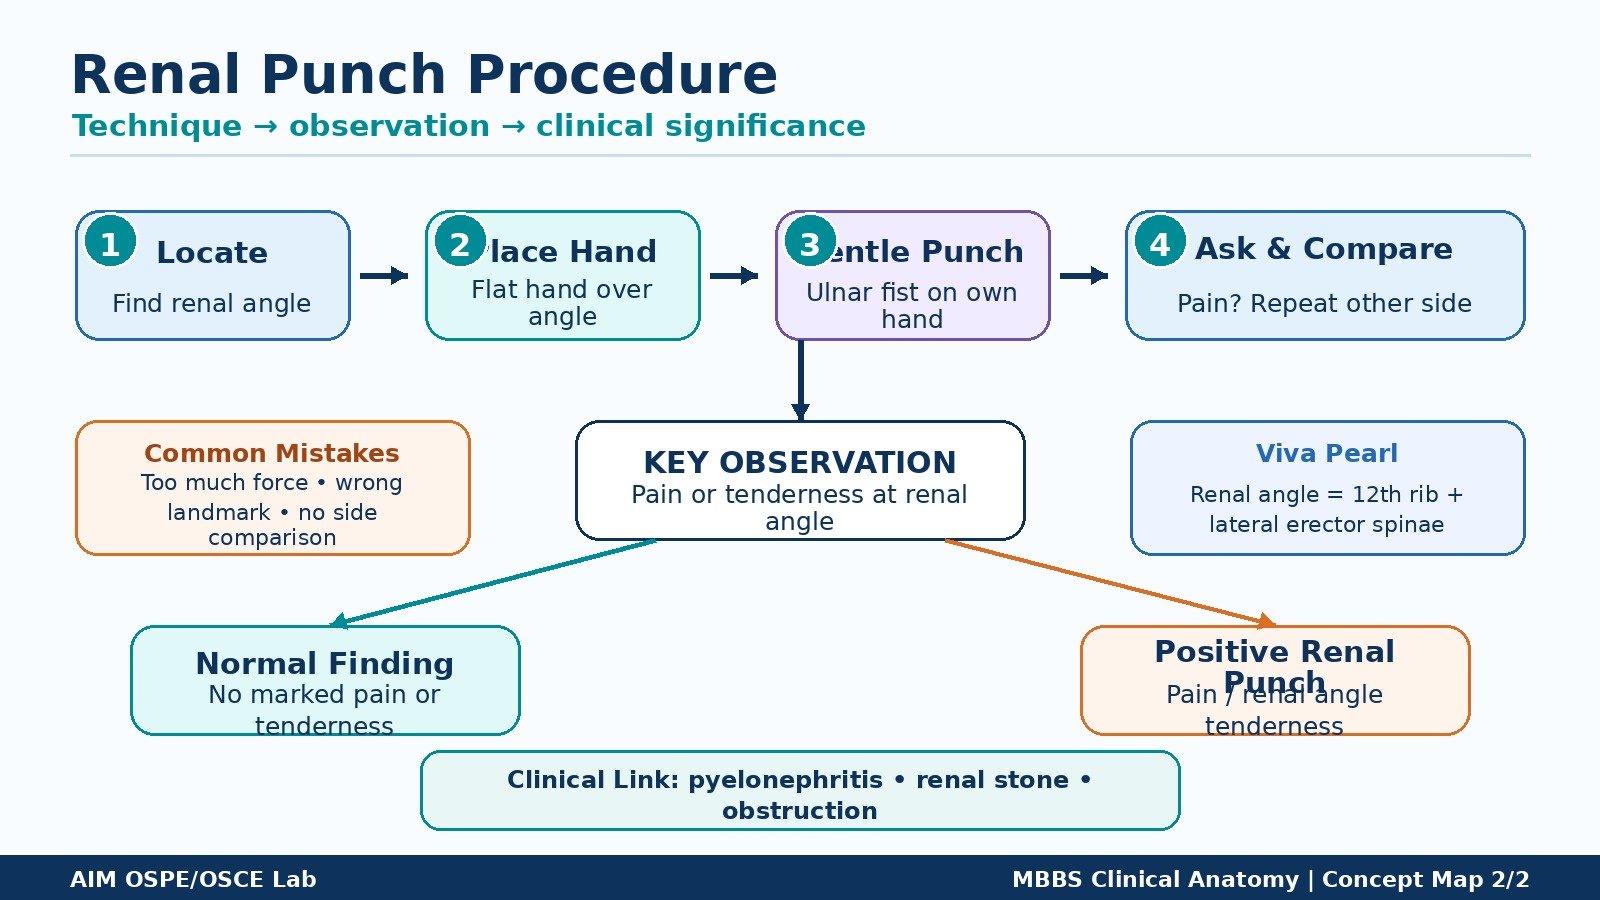
Student Task / Procedure
- Introduce yourself and take permission from the patient.
- Ask the patient to sit comfortably with the back exposed.
- Locate the renal angle on one side.
- Place one hand flat over the renal angle.
- Gently strike the back of your hand with the ulnar side of the opposite fist.
- Ask the patient if pain is felt.
- Repeat the same procedure on the other side.
- State the clinical significance of a positive renal punch.
Observation / Identification Points
The student should demonstrate:
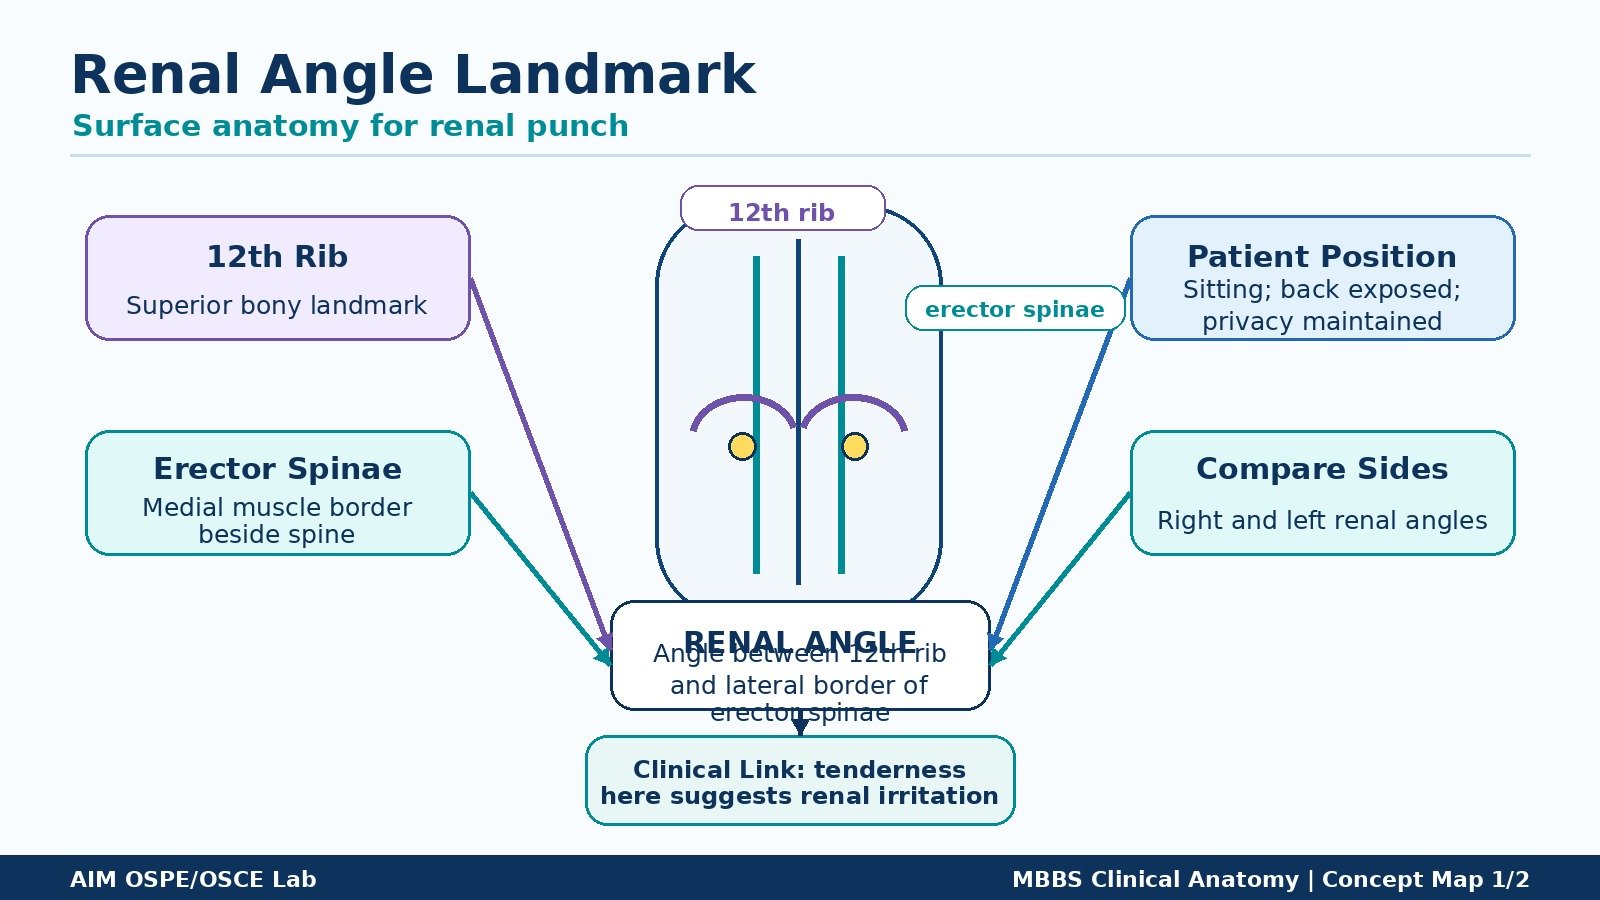
- Correct patient position: sitting, back exposed.
- Correct identification of renal angle:
angle between the 12th rib and lateral border of erector spinae muscle. - Proper hand placement over the renal angle.
- Gentle percussion using the opposite fist.
- Comparison of both right and left renal angles.
- Asking the patient about pain or tenderness.
- Awareness that excessive force should not be used.
Result / Interpretation
Normal finding:
No pain or marked tenderness on renal punch.
Positive renal punch:
Pain or tenderness over the renal angle.
Clinical significance:
A positive renal punch suggests irritation or inflammation of the kidney or surrounding tissues, commonly seen in conditions such as:
- Acute pyelonephritis
- Renal stone
- Perinephric inflammation
- Hydronephrosis or renal obstruction
Viva Questions
1. What is the renal angle?
The renal angle is the angle between the 12th rib and the lateral border of erector spinae muscle.
2. What is renal punch used to detect?
It is used to detect renal angle tenderness, suggesting renal inflammation or irritation.
3. What does a positive renal punch indicate?
It indicates tenderness over the kidney area, commonly seen in pyelonephritis, renal stone, or renal obstruction.
4. Why should renal punch be performed gently?
Because excessive force can cause unnecessary pain and patient discomfort.
5. Why are both sides examined?
Both sides are examined to compare right and left renal tenderness and identify unilateral or bilateral renal involvement.
Common Student Mistakes
- Locating the renal angle too low or too lateral.
- Performing the punch with excessive force.
- Forgetting to compare both sides.
- Not asking the patient whether pain is felt.
- Confusing renal angle tenderness with general back pain.
AIM Feedback
Renal punch is a simple but important bedside examination skill. Focus first on locating the renal angle correctly using the 12th rib and erector spinae muscle as landmarks. The punch should be gentle, controlled, and compared on both sides. A positive finding is clinically important because it may suggest renal inflammation, stone, or obstruction.
🖼️ Visual / Image Support

🧩 Concept Map / Interpretation Support